You can print identity cards for your staff and clients in Loan Performer in version 8.16 (or later). However for you to print these cards you need a special printer like the Evolis ID Card printer and some PVC cards.
Loan Performer comes with six predefined ID card templates named 8160001 to 8160006 that can be customized to suit your organization's needs. These templates are located in a folder called External Files->Idcard Printing.found in the LPF Installation directory - normally c:\LPF816.
Before you proceed with ID printing you need to;
i. Create the subdirectory “CustomReps” in the LPF816 (or later) installation directory.
ii. Copy the ID template files from the Idcard Printing directory to the CustomReps directory created in (i) above OR to a directory where your custom reports are stored.
iii. Login into Loan Performer 8.16 as a Supervisor.
How to configure Loan Performer to print identity cards
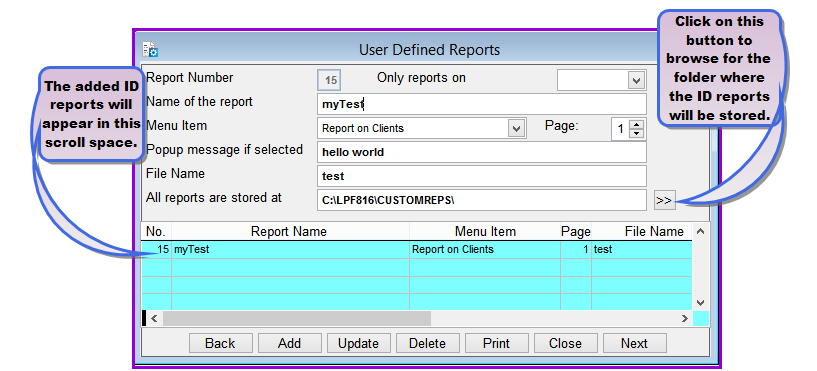
To configure ID printing you go to System/Configuration/Custom Reports and a screen like the one below shows up:
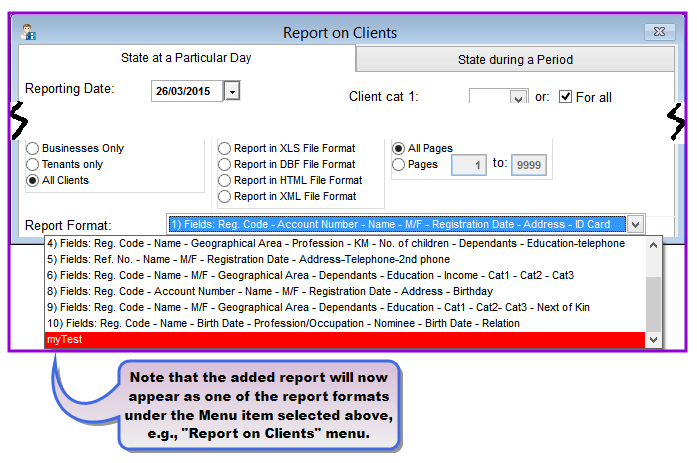
Click on the Add command button to save the new report. and on the Closecommand button to exit.
How to print identity cards
To print ID cards you go to Clients->Individual Clients->Identification and a screen like the one below will show up:
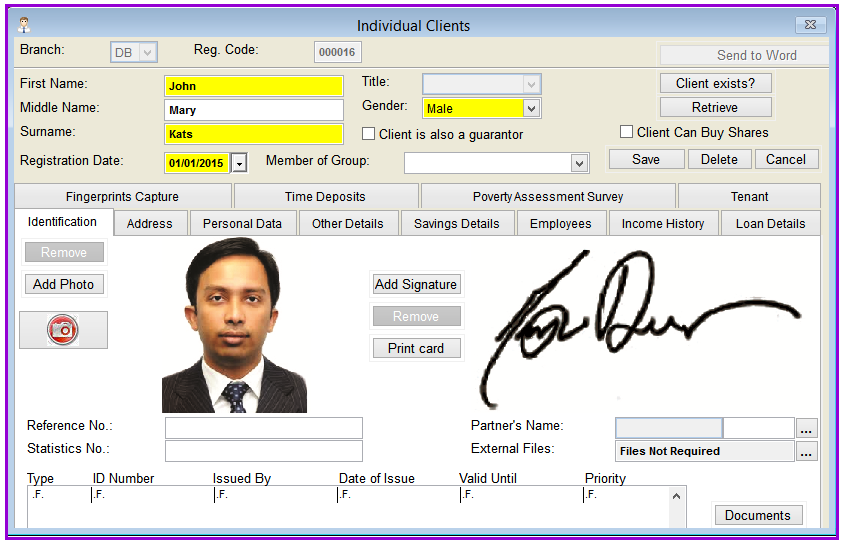
Print card: click on the print card button to load the following screen:
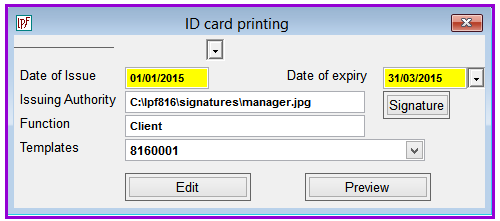
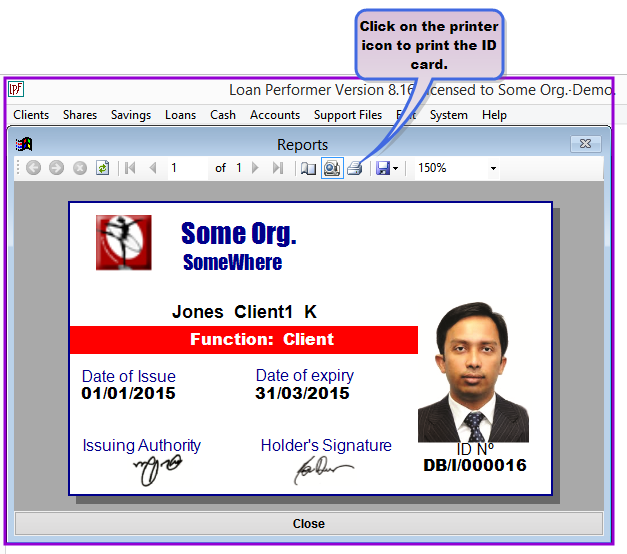
Click on the printer icon to print the card.
How to edit the Identity Card template
It requires the Telerik standalone report designer (Telerik.ReportDesigner.x86) to edit an existing template or to create a new template. The designer is supplied with Loan Performer versions 8.16 and later. The installer copies it to the Loan Performer installation directory. It is also found in External Files/Idcard Printing. Make sure this file exists in the Loan Performer installation directory.
[Click to Resize Image, Doucle click to return origional size]
Follow the steps below:
i. Select an existing template and click the Edit button on the following screen:
[Click to Resize Image, Doucle click to return origional size]
ii. Loan Performer loads the selected template in the telerik standalone report designer as seen below:
[Click to Resize Image, Doucle click to return origional size]
iii. From the above screen, it is possible to relocate, resize and change properties of all controls. However, the dimensions of the card should be kept as: Width – 3.37in, Height – 2.13in. This is the standard size of an ID card. New Parameters are not allowed.
iv. Save the changes and click on the Preview button to look at the changes. Change the report viewer to Preview mode to see how the card will be printed.
How to create a new Identity Card template
To create a new template, follow the steps below:
i. Select an existing template and click the Edit button on the following screen:
[Click to Resize Image, Doucle click to return origional size]
Loan Performer loads the selected template in the telerik standalone report design as seen below:
[Click to Resize Image, Doucle click to return origional size]
ii. From the File menu of the telerik report designer, Click “Save as”.
iii. Browse to the “CustomReps” directory OR to a directory where your custom reports are stored.
iv. Provide your desired report name and click Save.
v. Register this as a custom report at System/Configuration/Custom Reports
vi. Dimensions of the card should be kept as: Width – 3.37in, Height – 2.13in. This is the standard size of an ID card.
vii. New Parameters are not allowed.
The Nº 1 Software for Microfinance